Sunday, October 28, 2012

Journal 11- Gesture Drawing


      With this type of drawing, describing shape is less important than showing the action or the dynamics of the pose. Gesture drawings are not drawings of objects as much as they are of movement,weight and posture. Gesture drawing is spontaneous and created quickly. In your Journal please expound on the what you were to learn as explained in class (learning objectives) in addition write about the experience of drawing gestural figures, how did it affect your perception of the human figure. You will only have 7 days to respond to this journal. 

        Gesture drawing was a very unique experiences—most of my life I was told to pay attention to details, focusing on the finer aspects of my drawings. That is not to say gesture drawing completely abandons detail, but rather, emphasis is shown, as described, to movement, weight, posture, and proportion. Contour lines are not as defined as in other drawings. Often times, artists use this method to warm up, just as one would in sports, to get a feel for proportion, and to build muscle memory. In class, we were told that there are three phases to gesture drawing. Phase one is more or less quickly drawn “scribbles,” where the artist usually takes less than a minute to complete the drawing. Phase two starts to include contour lines to get the figure of the body, but these are free flowing and still are not very defined. Phase three, the last step, is a full definition of the figures.
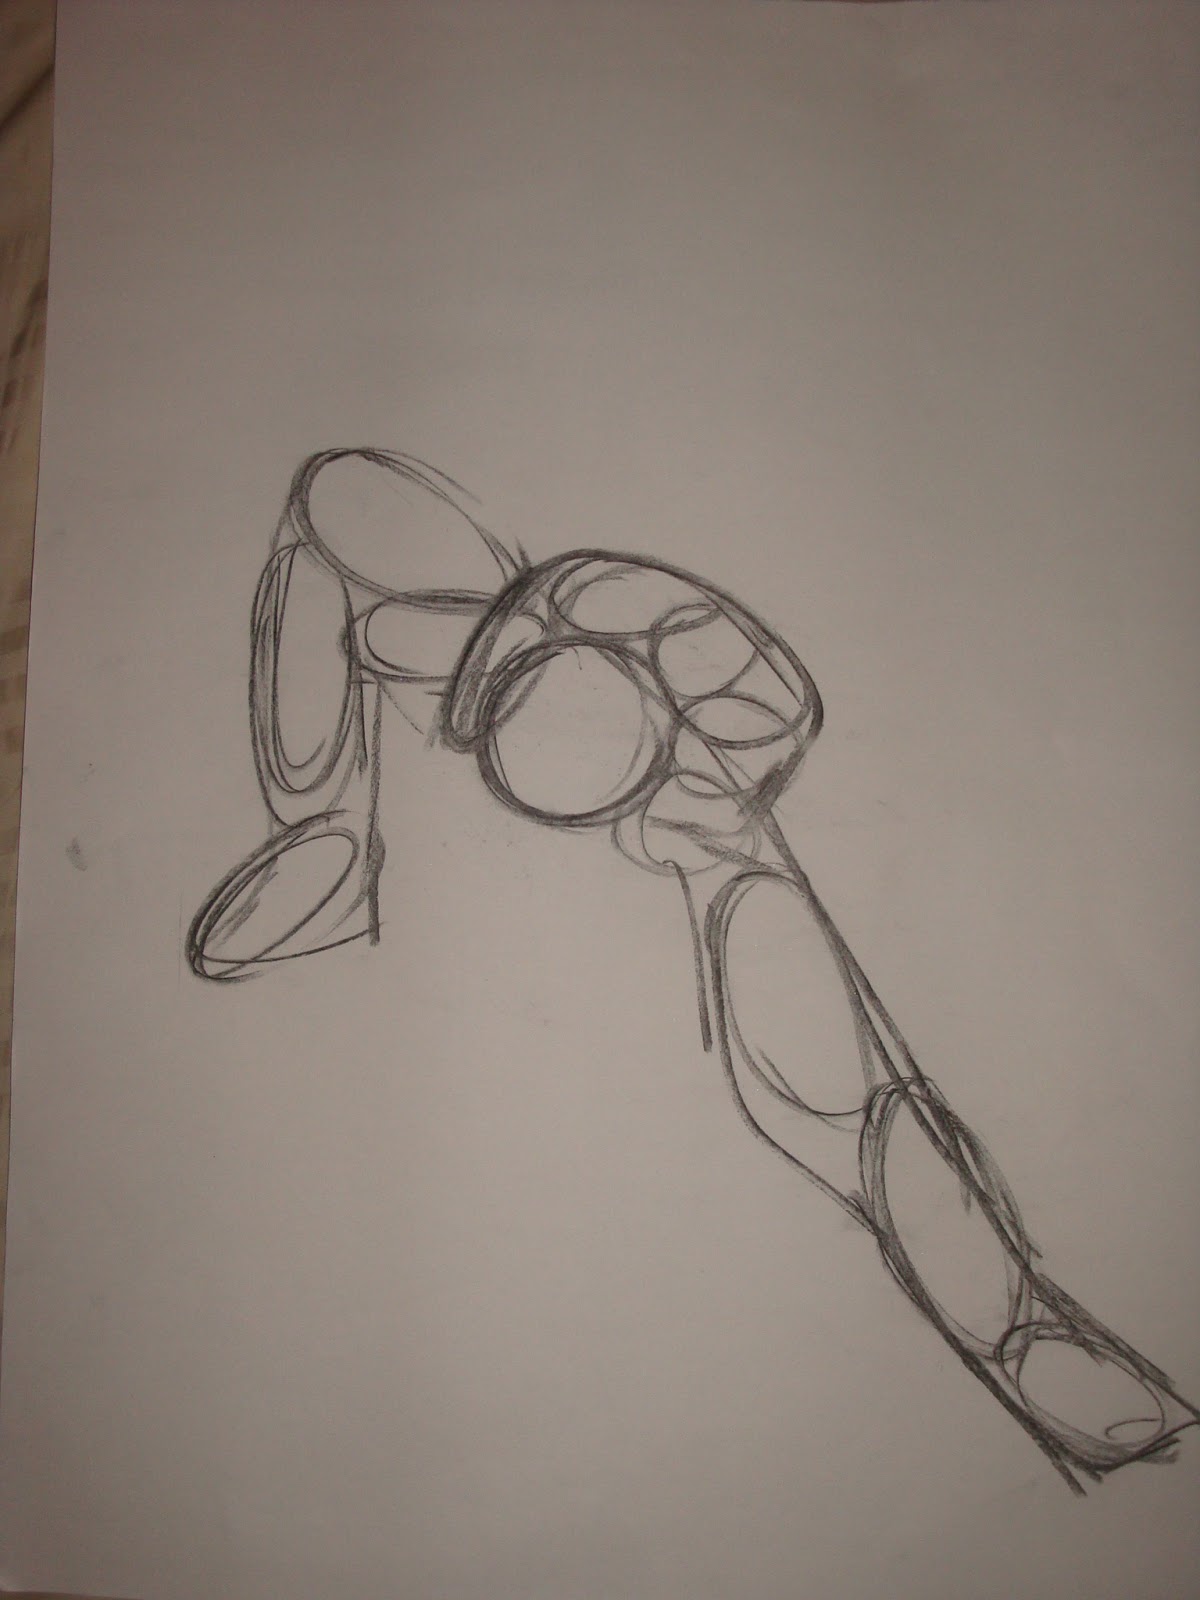
       The experience was very fast paced—we were given only two minutes to complete our drawings. My first drawing (included in this journal entry), I was unable to get to the arms of the figure as I was not acclimated to such fast paced drawing, but I ended up getting it near the end of the class. Of course, I started out with a wire along the legs of the figure as taught and started to put in bubbles, which was difficult for me at first. The second drawing I was able to complete—there are minimal bubbles, but that was because the wire (the arch of the back) was so big. This assignment was great as I was able to pick up a new technique to add to my (small) repertoire or drawing techniques—I had no idea that artists had a “warm up” activity. Also, it will help me in future drawings where proportion is necessary to get the final drawing to look like the subject.


Sunday, October 14, 2012

Journal/Reflection #7 Blck Paper/white chalk


You were to have created a contour line drawing of the image-then build up the Value using white chalk so that the contour line is no longer visible. Record your thoughts...did you think about surface contour on the "Abraham Lincoln " ?? Have you increased your range of value from light to dark to more than four?

The “Abraham Lincoln” exercise was a very intriguing one. All my life, I had always thought of drawing as filling in negative space, using a pencil and filling in the white areas with darkness to create an image. It was quite a shock to me when I discovered this assignment would be a total reversal—we would be using white chalk to fill in the black spaces.

This exercise really opened my mind to the concept of negative and positive—it is never solid, rather, it varies from exercise to exercise. The contour line was simple enough—it was like drawing with paper and pencils—it was building up the value that was quite difficult for me to grasp. White is white, how can it become whiter? Although it was a struggle at first, I eventually created some varying shades of value—by erasing off some chalk and by building up layers of chalk on other portions, allowing for Lincoln’s weary, yet strong, face come through. Portions of the left half are noticeable brighter. The beard also has a different value from the skin, and we can even see the texture of the beard come through. The forehead fades from a bright value and slowly gets darker until it abruptly goes black. We can even see the light fade under Mr. Lincoln's hair at the top of his head, plus the shadow cast by his own nose.


Journal/Reflection #6 Interior (Surface) Contour Still life


 Please make an entry for the Journal/Reflection on the Interior (Surface) Contour assignment that we did in class. Explain the 3 different types of LINE and then how you used some of them in your drawing, if you did, also discuss how you used line and created the different values in your drawing, what technique (explain). 
It really works best if you write your reflection first in a word processor and then cut and paste it into the entry space.

This assignment again required us to draw ATLEAST 4 objects: the obects here are a bird, a vase, a roll of paper, and a torso. For the purposes of this exercise, we were taught about the three different lines. The first one is the actual line, a straight or curved line that can vary by thickening or darkening the line itself. An implied line, the second example, are perceived and created by the mind itself when it sees points in a composition that can be connected to form said line. Lastly, the psychic line is presented as an object pointing, or directing, our attention to another object, making our mind create a line without actually seeing a line.

The assignment was done on a neutral ground, and we were to draw first with our eraser--to carve into the neutral ground. This assignment is composed MAINLY of actual lines so as to give shape and form to the objects in the composition. However, various areas, mainly on the cloth, are composed of implied lines to give texture to the object—so that the viewer may see that the cloth is not rigid, rather, it bends and folds, it has creases! Additionally, the light cast upon the still life also creates an implied line in the shadows: when one follows the shadow from the bottom right of the vase and go towards the bottom right of the torso, they see the limit of the light exposure. As for the psychic line, there are a couple, mainly created by the bird facing a certain direction and one of the arms going off the paper. Part of the roll of paper is hidden inside the vase, but the way its drawn lets the viewer know it is still there, and they envision the rest of the roll, completing the image with those psychic lines.

We can also see that maximum exposure to light, the brightest value, is on the left side of the torso, so we know what direction the light is coming from. This brightening was done through the use of chalk so as to increase the light value from the neutral. Crosshatching techniques were done to create a darker value necessary to show shadows and create many of the implied lines on the toga on the torso.